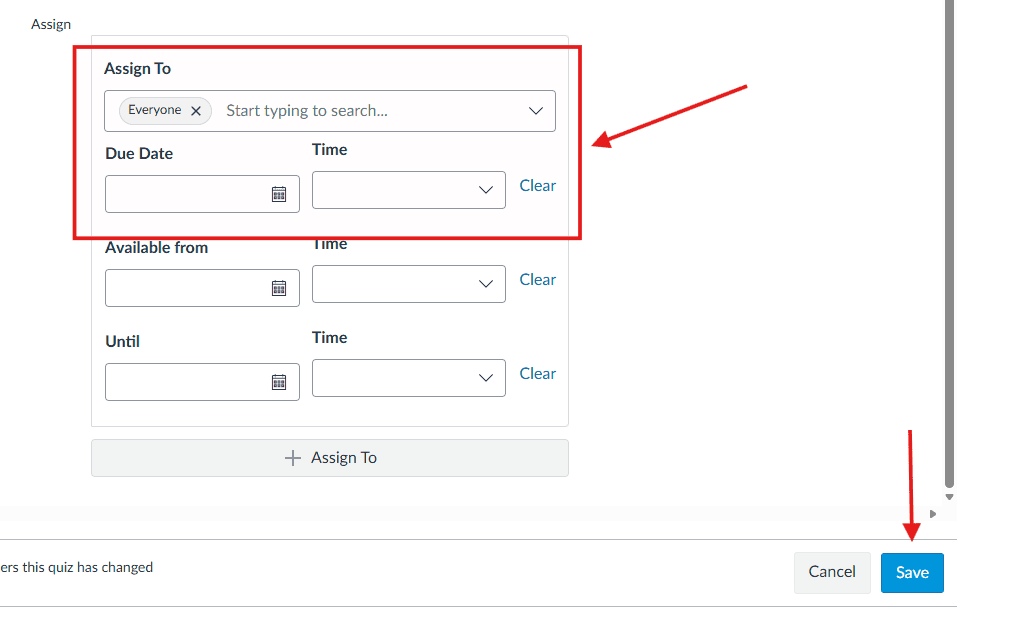
How to Change Due Dates For One Student
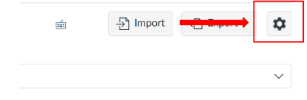
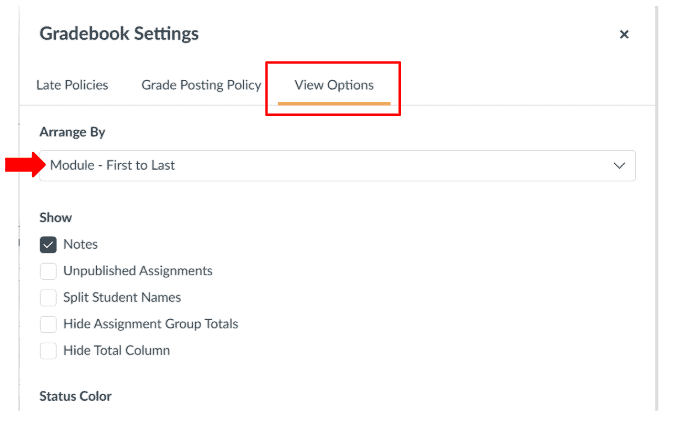
How to Modify Gradebook View
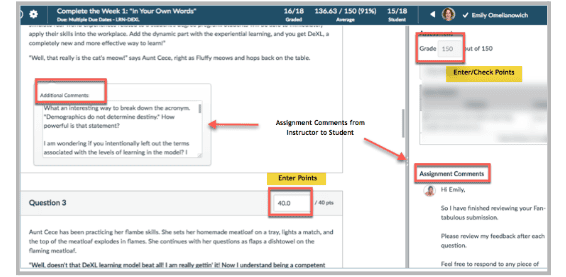
How to Grade Quizzes with Written Answers (Speedgrader)
How to Manually Update a Cerego/Learnit Grade
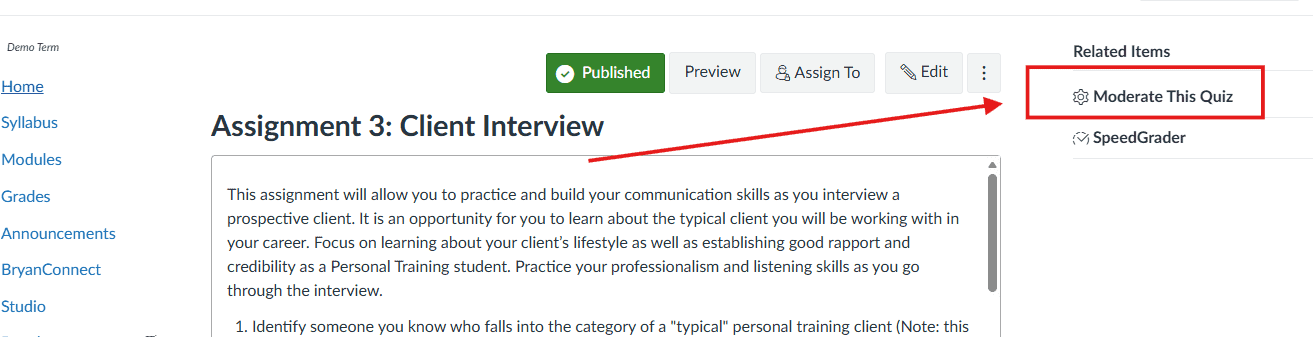
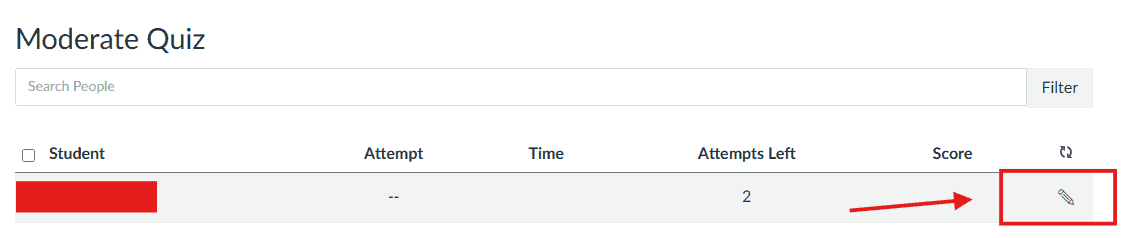
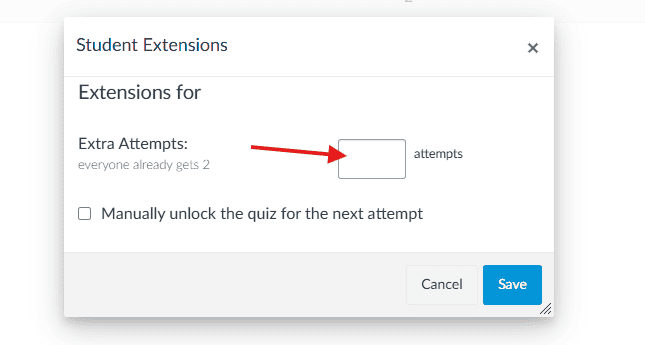
How to Add Additional Attempts to a Quiz
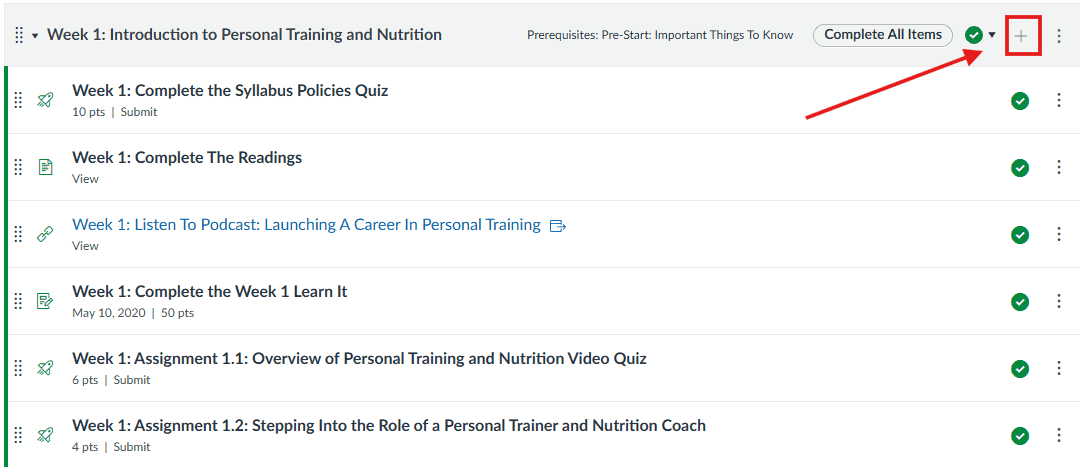
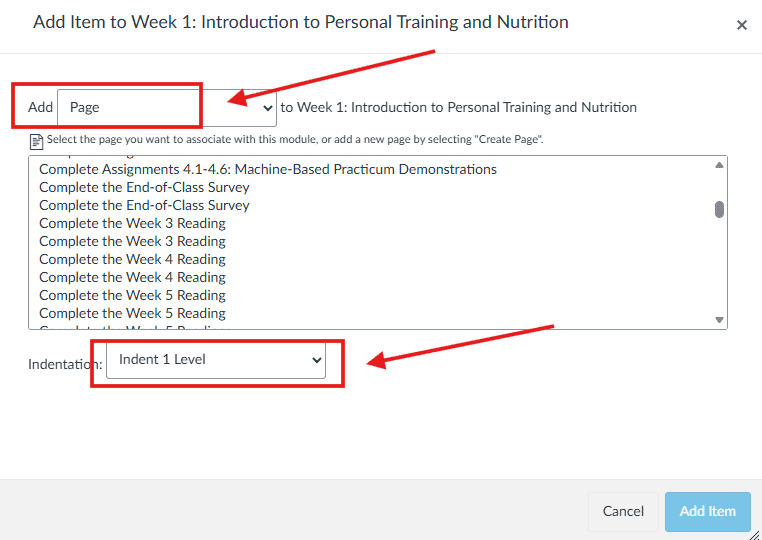
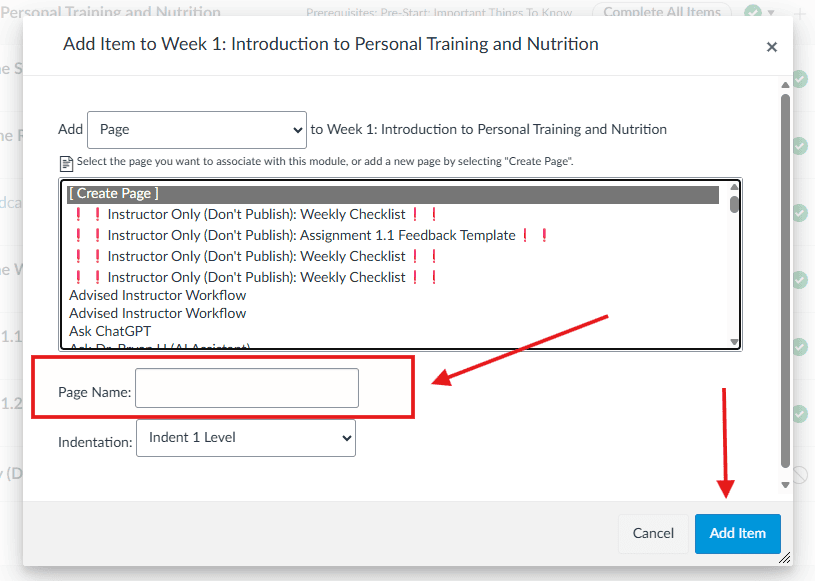
How to Add a Content Page to a Course

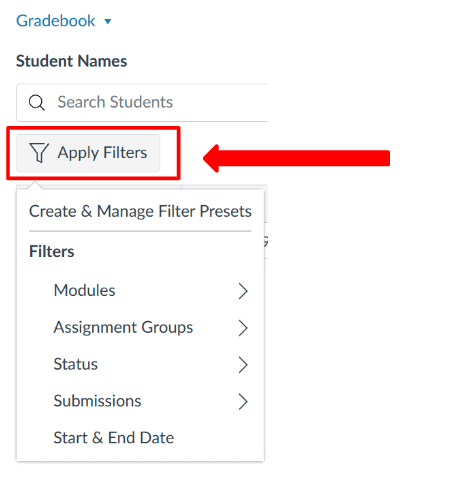
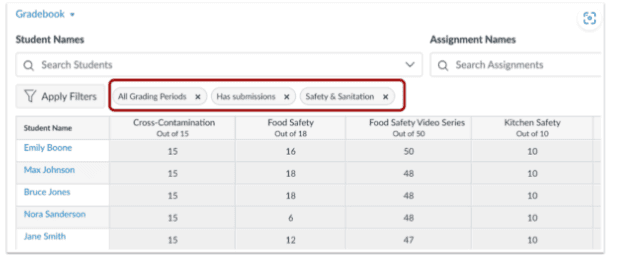
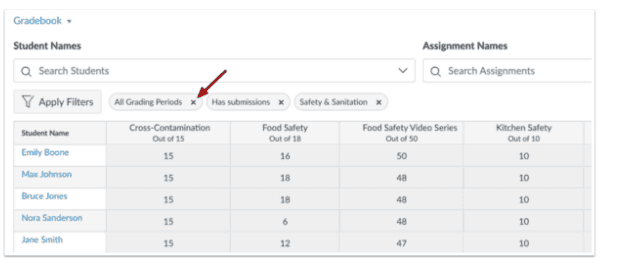
How to Apply and Remove Gradebook Filters
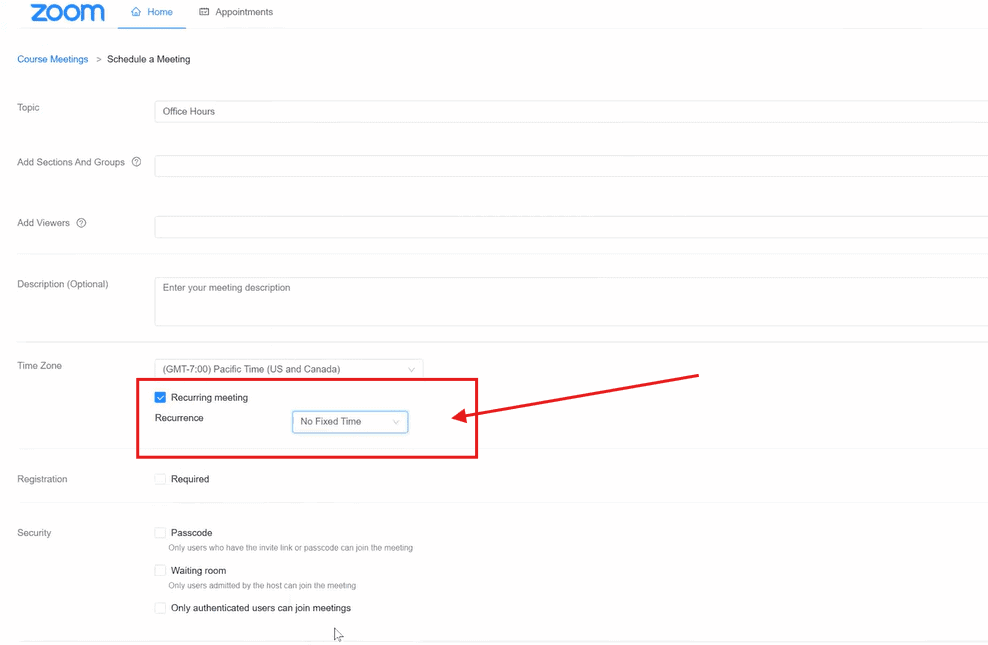
How to Create a Recurring Zoom Link for Weekly Office Hours
How Create a One-Time Zoom Link For Appointment-Based Meetings
